TouchDesigner 連結 Arduino:Arduino 接收由 TouchDesigner 發送的數據
TouchDesigner 端
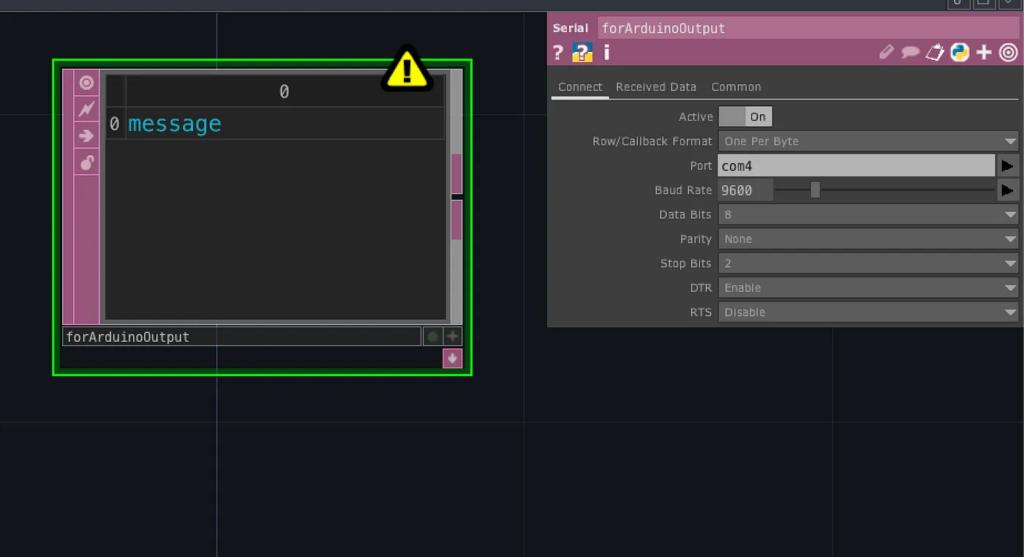
就像是從 Arduino 發送數據到 TouchDesigner,必須先創建一個 Serial (DAT)。因為範例需求,這裡我使用了 “One Per Byte”。(在 Serial (DAT) 面板中,參數 “Row/Callback Format”)

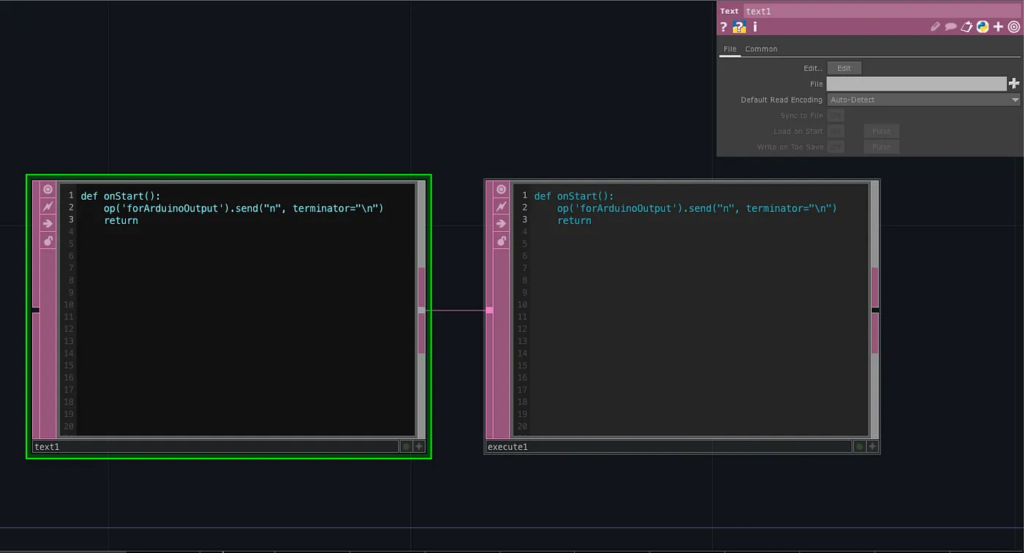
發送數據的程式碼
def onStart():
    op(‘forArduinoOutput’).send('n', terminator='\n')
    return
我使用了 onStart() 函數,因為我將 Execute (DAT) 連接到觸發該腳本。
“forArduinoOutput” 是我的 Serial (DAT) 名稱,使用 send() 將數據發送出去。
“n” 是您要發送的字符串。“terminator=’\n’” 讓接收方知道字符串結束並創建新的一行。

Arduino 端
完整程式碼
void setup() {
  Serial.begin(9600);
}void loop() {
    String s = "";
    while (Serial.available()) {
        char c = Serial.read();
        if (c != '\n') {
            s += c;
        }
    }
    if (s != "") {
        if (s == "word") {
            // Execute Something
        }
    }
}
解釋
我們先將 Serial Baud Rate 設定為 “9600”
void setup() {
  Serial.begin(9600);
}
在 loop() 函數中,我們必須檢查 Port 是否成功連接。
while (Serial.available()) {

}
只要連接上後,就從 Port 讀取數據。但是現在我們得到的是 byte 資料。我們必須重新連接它們成為一個 string (字符串),並添加條件語句來知道字符串的結尾。這就是為什麼我們在 TouchDesigner 中將所有字符串都添加了 “\n”。
char c = Serial.read();
if (c != '\n') {
    s += c;
}
最後一步,可以使用接收到的資料執行任何想要的腳本。例如,我檢查收到的資料是否等於 “word”,然後再執行某些動作。
if (s != "") {
    if (s == "word") {
        // Execute Something
    }
}


